|
3.1.1 Map Icon Tools
|
 
|
|
3.1.1 Map Icon Tools
|
|
3.1.1 Map Icon Tools
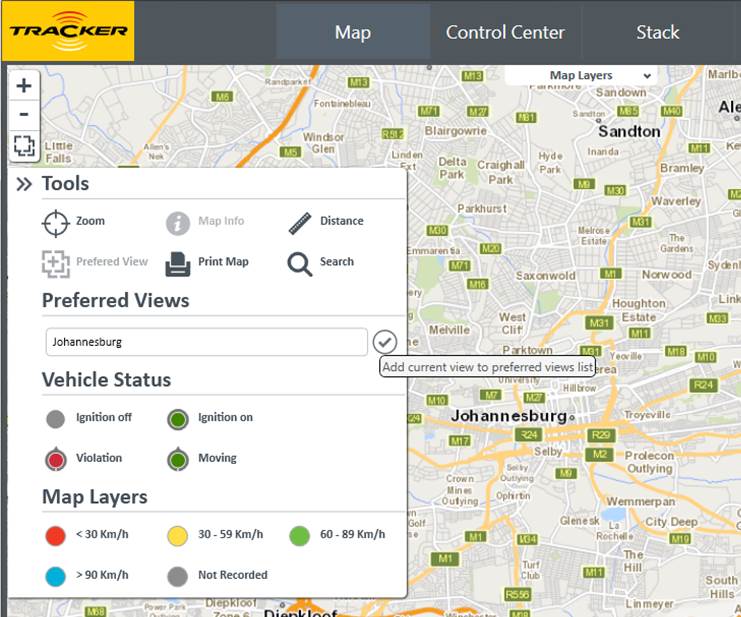
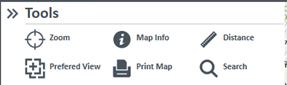
Certain of these icons are active when the map screen opens. Other icons
require user inputs before they become active. The icons below have the
following purposes:
|
Icon |
Purpose |
|
|
Zoom: This icon is inactive to the user until a vehicle has been Searched. (Refer to Section 3.3 for detail ). Once a vehicle has been identified, "left click" on the vehicle registration in the Working List. Empower zooms automatically to the last reported position of the vehicle on the Map.
Moving the pointer over the symbol will display the vehicle registration number next to the symbol. By clicking on the symbol once, the registration will be visible for the duration of the login session. |
|
|
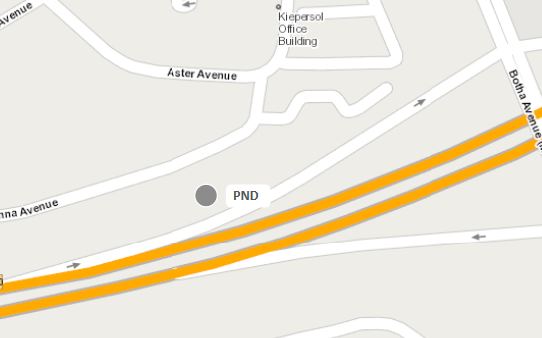
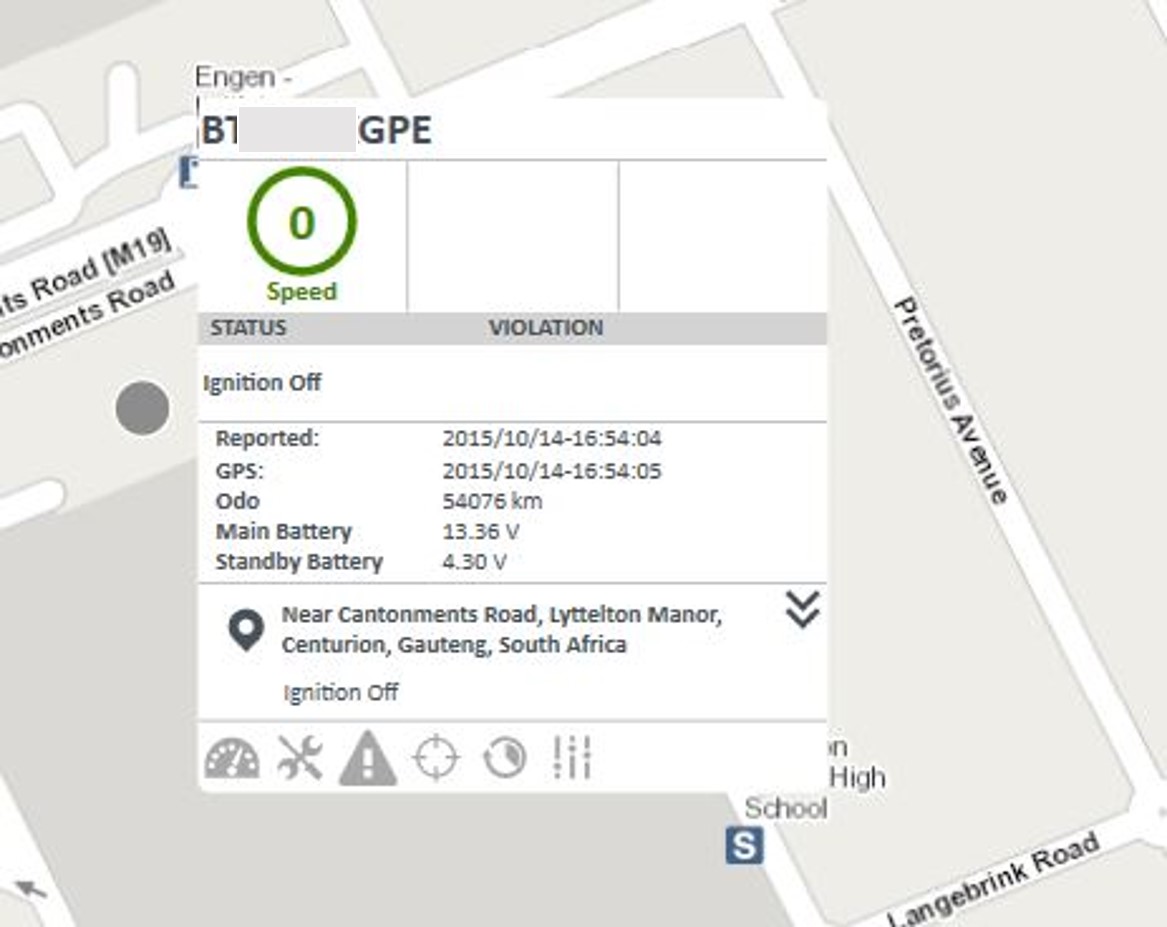
Map Info: The Map Info icon will become active when the map has been zoomed in to a scale of approximately 1km from the vehicle. When the map info icon is selected, the mouse pointer will indicate a question mark, while this question mark is active the user can click anywhere on the Map and a pop up will indicate the location of the selected point. Click on the Map Info option again to disable the Map Info option. To view additional vehicle information, click once on the vehicle symbol on the map, the registration number will be visible as a solid label, click once more and the additional vehicle information will be displayed.(Refer to 3.3 for detail ).
|
|
|
Measure Distance: This icon is always active to the user. "Clicking" this icon, allows the user to measure distances on the displayed Map. Open the Map and adjust the scale to the desired level. (Refer to par 3.1.3 for details ). 1. With the pointer on the departure co-ordinates, "left click" the mouse button marking the starting point of the route. 2. Move the pointer (in straight lines) to the next coordinate on route and "left click" again. The route between the two points is indicated by a Red line. 3. The distance between the two points, is given in meters /km. Continue till you reach the end of the planned route. 4. The individual distances between the points on route are displayed as well as the accumulated distance end the final destination. To remove the marked route, "double click" on the route.
|
|
|
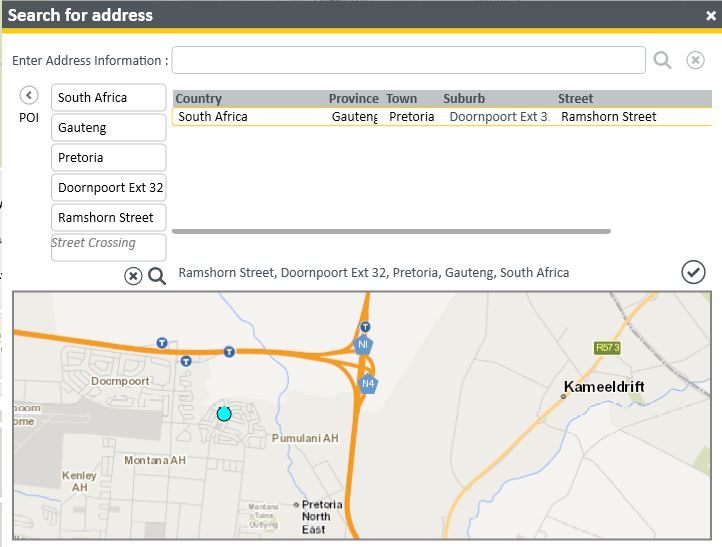
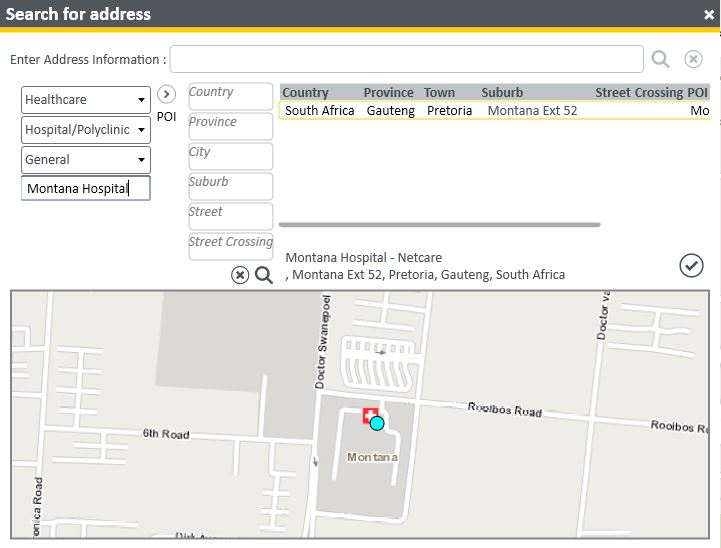
Search Location: This icon is always active to the user and allows the user to search for a geographical location or a Point of Interest (POI) on the displayed map. Follow these steps: 1. "Click" on the Search Location icon. 2. The Search for address window opens. Three options are available. Option 1 - Search for a Location: (Street, Town or Suburb) 3. Use the Enter Address Information field to enter the address of the location. Remember to seperate Street, Town and Suburb with Commas. 4. "Click" on the Search icon on the right side of the field. 5. Empower will search for the location. Empower will display all the listings matching your search, select the correct option from the list. The selected option from the list will be displayed on the mini map. If the location is confirmed as correct, select the "select address and close window" option, the selected address will be displayed on the large map indicated by a red dot on the map. 6. When hovering over the dot on the map, the coordinates and address will be displayed. The location data is displayed in the identifier fields of the spread sheet. Option 2 - Search for a POI or Registering a POI: 7. Enter the address details (Country, Province, City, Suburb and Street) into the available fields. (Empower provides assistance to the user with descriptions of similar nature). Select the correct detail by "clicking" on it. 8. "Click" the Search icon. 9. Empower will search for the location. Once found, it zooms to the point on the map indicating it with a shaded circle. If the address details are wrong, Empower will notify the user accordingly. Re-enter the correct address details. 10. If this address has future value and will be regularly visited, it can be registered as a Point of Interest (POI). To register, "click" on the POI arrow. 11. Pre-defined options (Group, Category and Subcategory) are displayed with drop-downs to assist the user identifying the POI type. "Tick" the most relevant description for the POI option. 12. Enter a user defined POI Name. 13. To save the POI position and name, "click" the Save icon. 14. To clear field information "click" on the Clear icon. 15. To close the window "click" on the Exit icon. Option 3 - Search Coordinates Enter the coordinates in the enter address information field. (Step 3) The coordinates need to be in decimal degrees only. First Enter the Latitude then the longitude, the latitude and longitude should be separated by a space only. The latitude and longitude should be indicated in one of the following formats: -25.711251 28.265602 or S25.711251 E28.265602
When a Site has been created under Zones, you will be able to search for it in the POI section. 1. Click on
the Search Location icon. 5. Empower will search for the site name and once found will indicate the POI with a point on the map.
|
|
|
Toggle Preferred Views The user can setup map views for different areas. Using the Toggle Preferred View icon the user can switch between views. The steps to follow are: 1. Open the Map at the preferred area and obtain the desired area scale. (Refer to 3.1.3 ). 2. "Click" on the Toggle Preferred Views icon. 3. The Preferred Views window open. 4. Enter a user defined name into the field. 5. "Click" on the Add icon to register the area. The name of the area is added to the Name list. 6. More areas can be identified, named and added to the list by following the same procedure. 7. To remove an area from the list, "click" on the Name in the list. "Click" the icon Remove selected view from preferred viewing list. The Name is removed and the list is updated. 8. To close the dialog box, "click" the Exit icon.
|
|
|
|
|
|
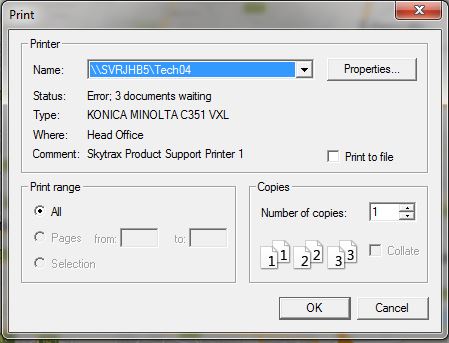
Print: 1. The user can print the displayed Map window by "clicking" the Print icon. 2. Empower will default to the line printer connected to the workstation. 3. Set-up the printer Properties. 4. Select the OK button to print the screen view. 5. To close the window, "click" the Exit icon.
|
|
|
|