3.4.1 Drivers Tab Functions
PreviousNext

3.4.1  Driver Tab Functions

Icon Symbol

Purpose

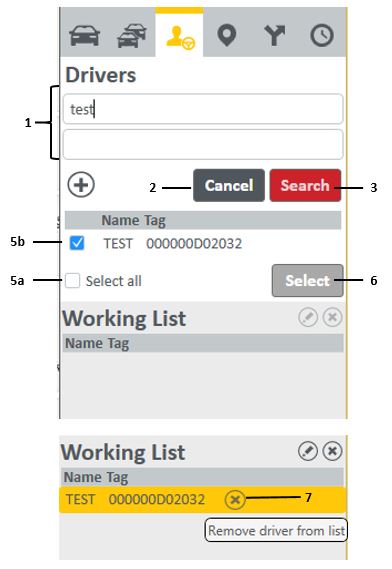
Search for driver containing search criteria.

1.     Enter the correct data into one or more of the search fields. (Driver name or Tag (ID)).

2.     Activate this icon to clear all Driver or Tag data entered into the search fields.

3.     "Click" this icon to retrieve the information from the Tracker database. This may take a while.

4.     The retrieved information will be displayed in the section below Search.

5.     The user has two options to add the retrieved data to the Working List:

a.     "Ticking" the Select All tick-box selects all the Drivers or,

b.    Individual drivers can be picked from the list by "ticking" the relevant box next to the Tag ID.

6.     After the selection, the user activates the Add selected to working list icon. Only the selected Drivers are transferred to the Working List field.

7.     To delete a Driver from the Working List, move the mouse pointer over the delete icon. You will be prompted with Remove Driver from list. "Click" to remove the driver from the list.

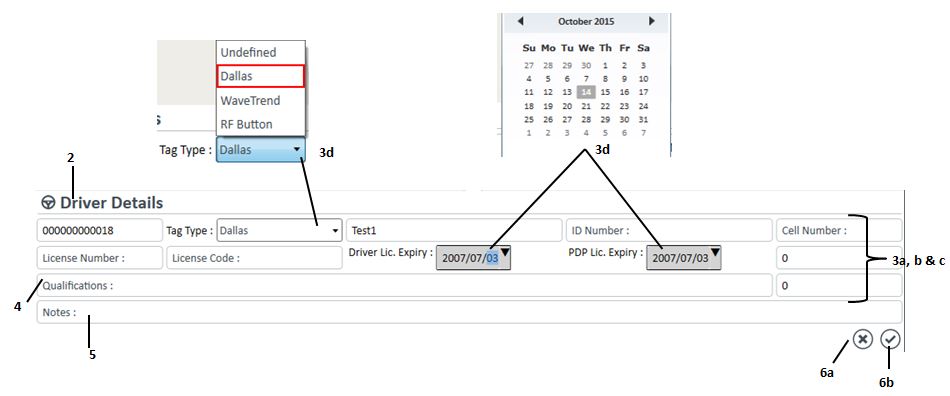
Edit Driver:

1.     Search for the driver which particulars need to be edited. Transfer the driver to the working list and select the driver.

2.     Click the Edit Driver icon to open the Driver Details window.

3.     Change the particulars of the selected driver by:

a.      Add new data into empty fields.

b.      Remove data from populated fields.

c.      Update existing data fields.

d.      Two drop-down boxes enable the user to change the Tag Type as well as the Driver Lic(ence) Expiry date and Public Drivers Permit (PDP) Lic. Expiry date.

4.     Enter driver Qualifications.

5.     Enter Notes for future reference.

6.     The user can now:

a.     Close the window without saving the changes.

b.    Save the changes and exit the window.