|
7.1: Jobs Tab Functions
|
 
|
|
7.1: Jobs Tab Functions
|
|
7.1 Jobs Tab
Purpose: The Jobs Tab allows the user to create a “job” that can be sent to a vehicle. A vehicle can be dispatched to a job with a single or multiple stop points. This feature is only available provided that a Tracker Personal Navigation Device has been included in the installation.
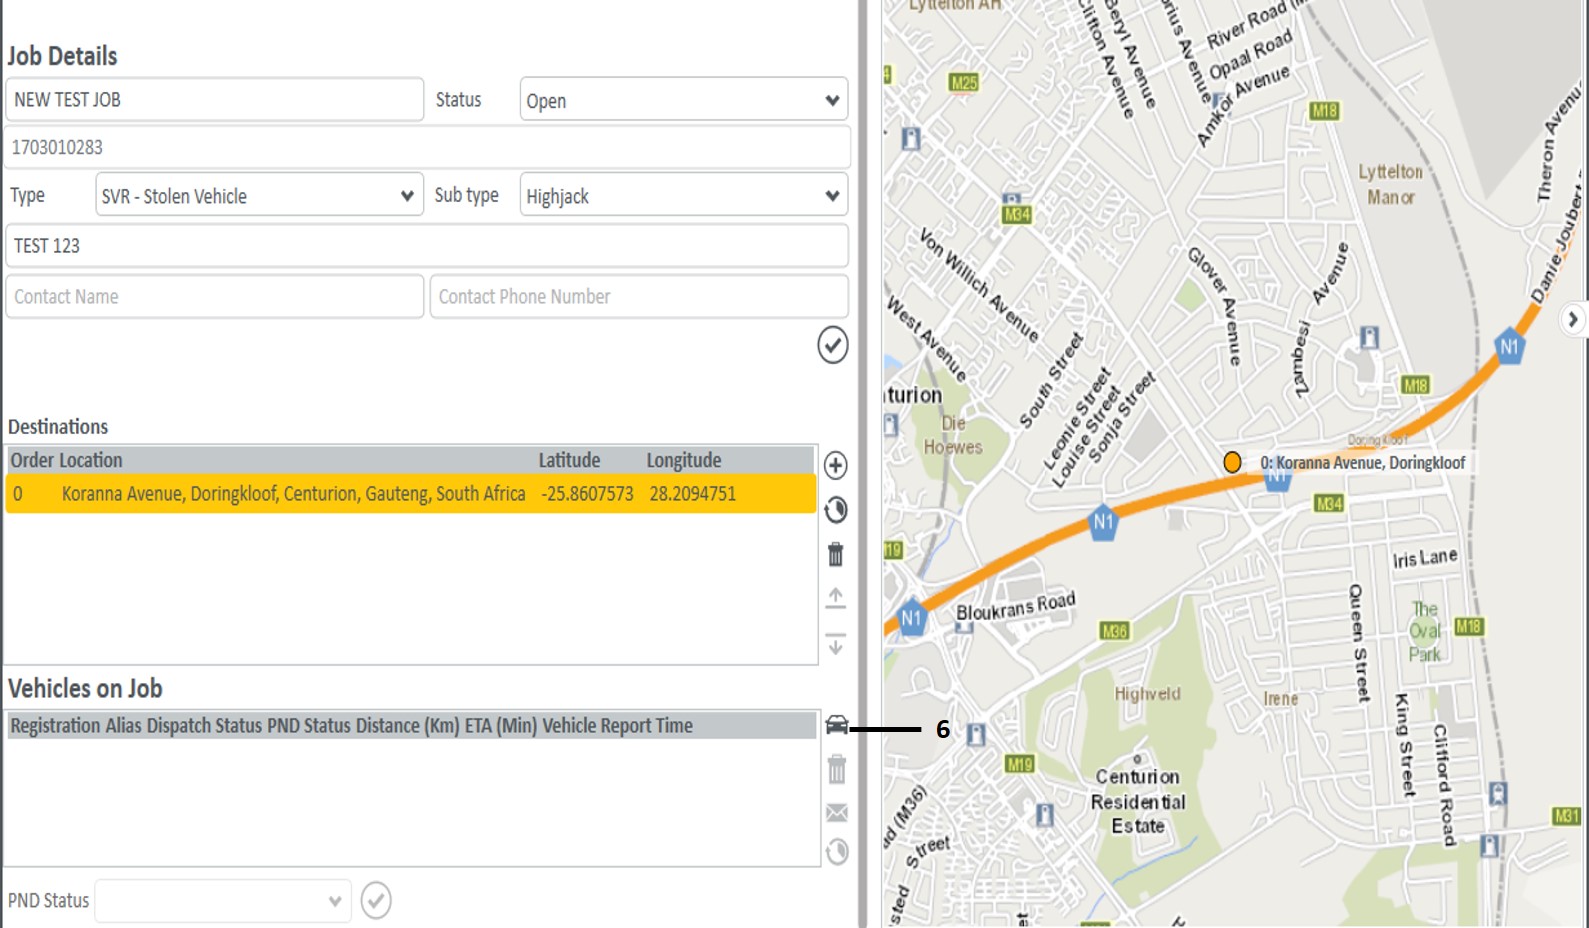
1. Select the Jobs tab which opens an unpopulated tab.
2. In the “Job Details” section, enter a Job Name; select a job Type and Subtype from the drop down lists and enter a “Job Description”.
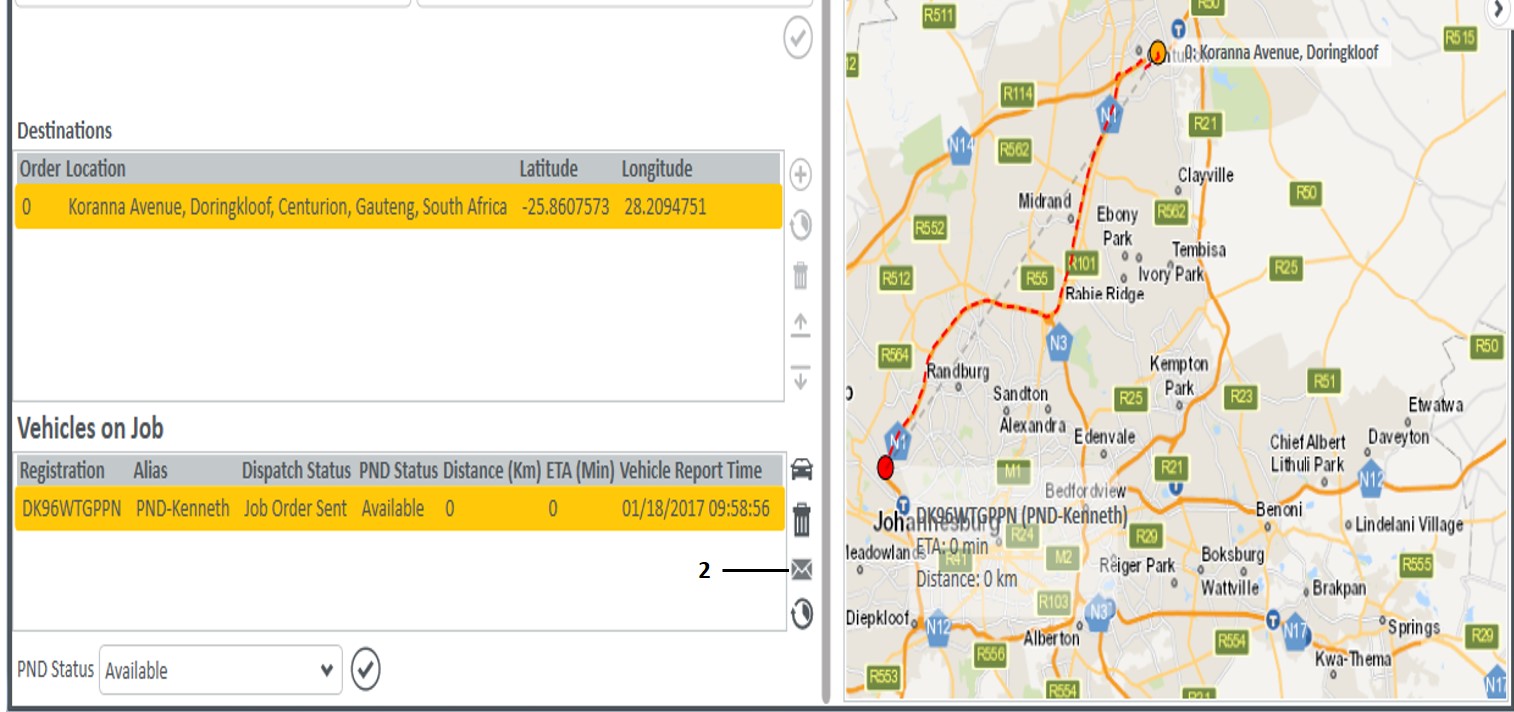
3. In the “Destinations” section, click on the “Add destination” icon and search for the required destination.
4. More than one destination can be added to one “job” .
5. Once a destination has been selected, the user will be able to save the “job”.
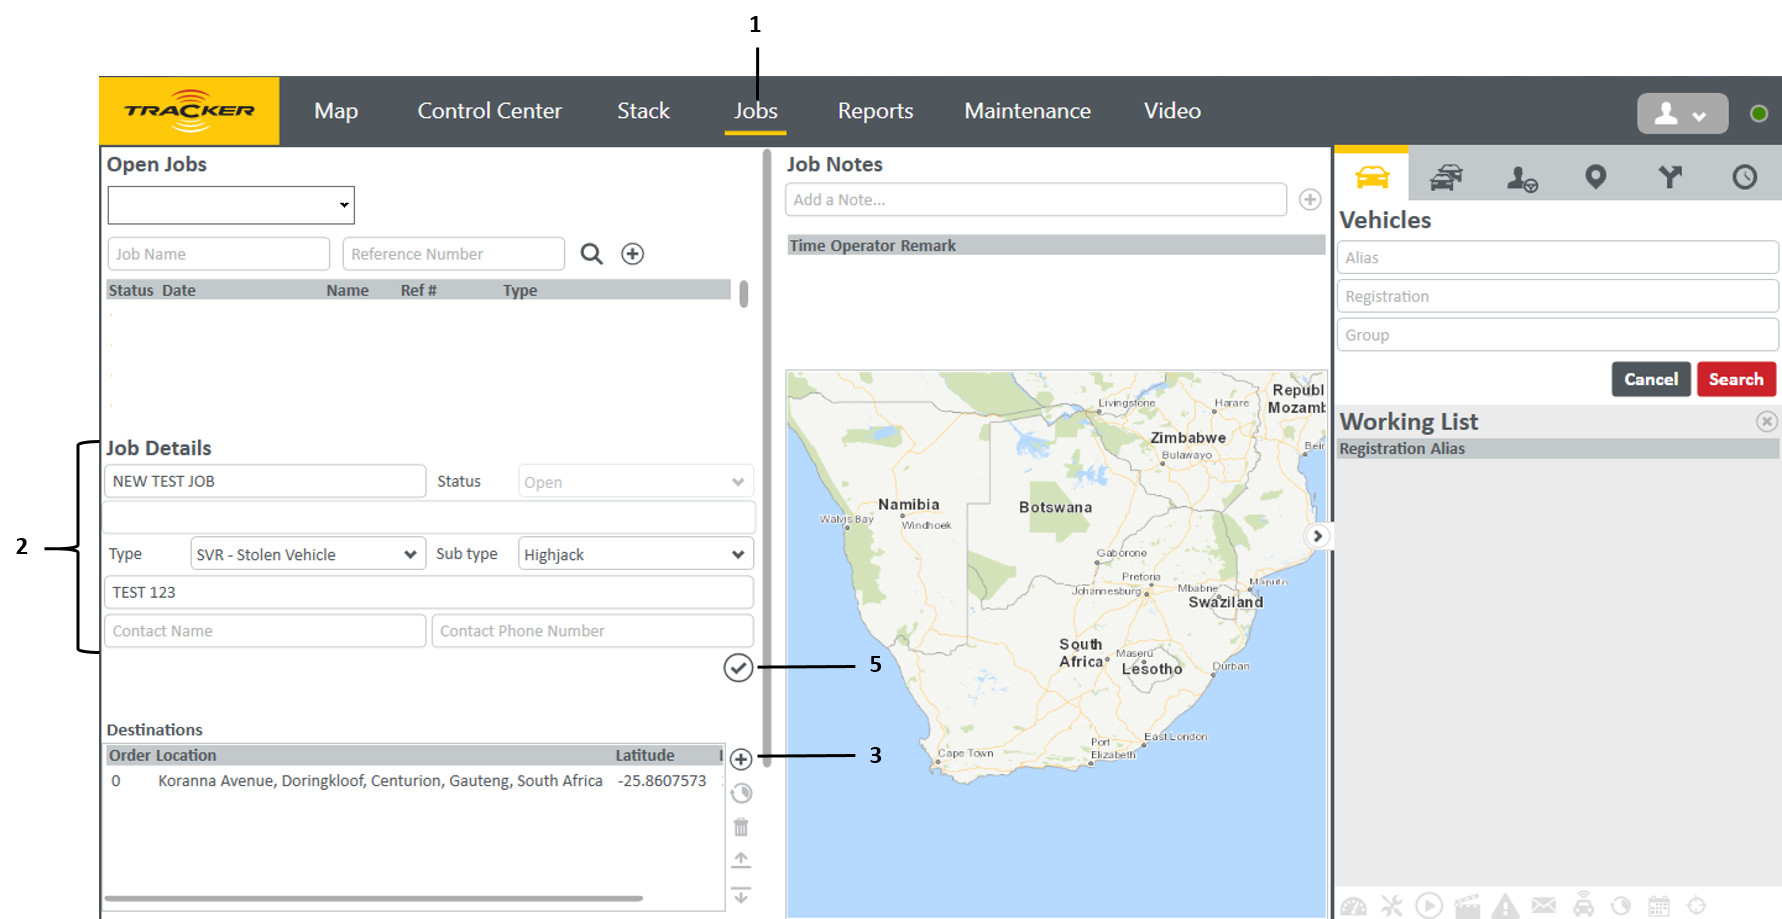
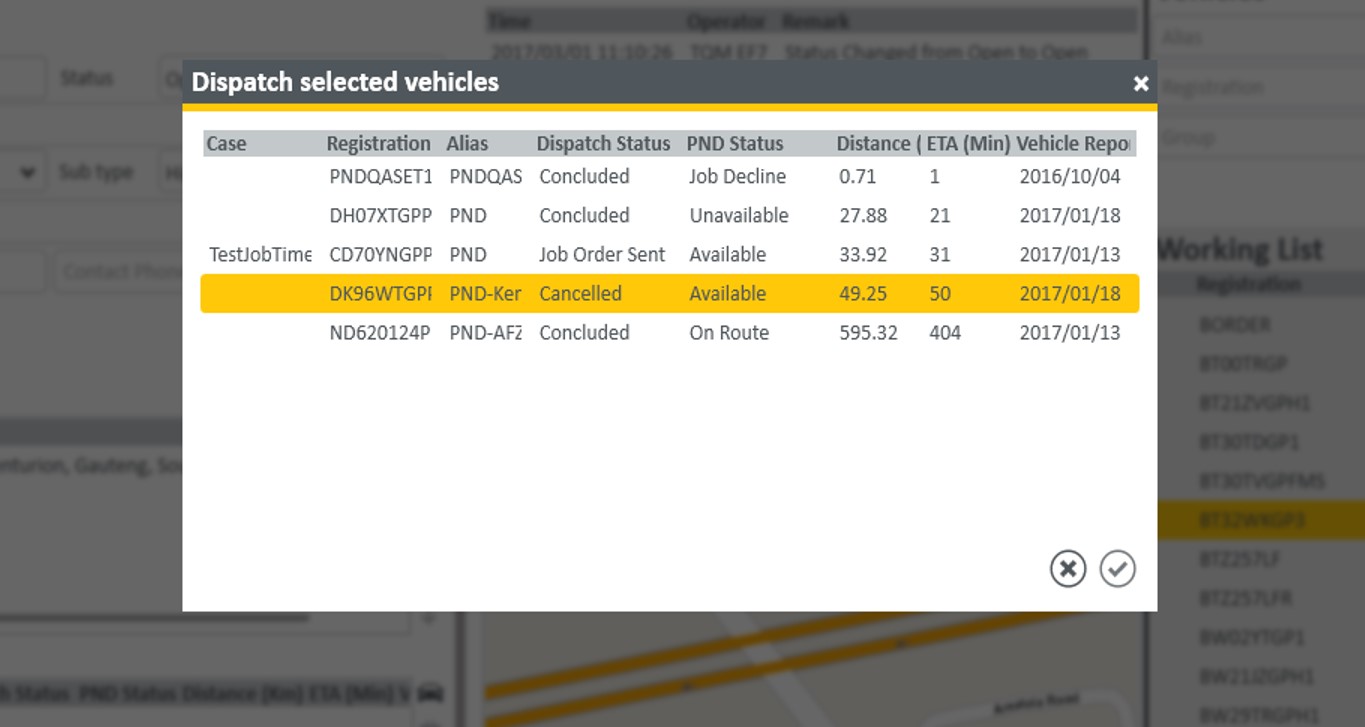
6. Once the job has been saved, select the dispatch option.
7. A popup will open allowing the user to select a vehicle to dispatch.
8. Note a vehicle can only be dispatched provided that the PND status is “Available”.
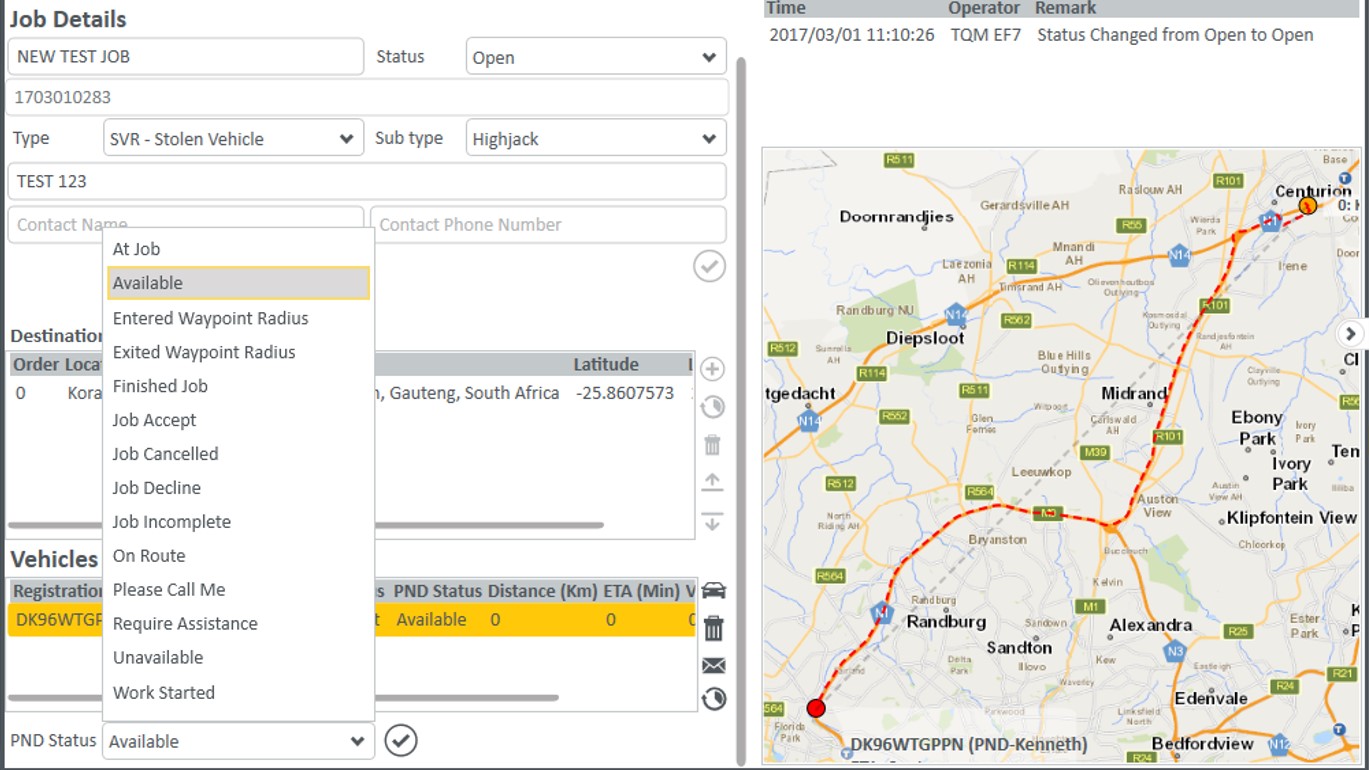
9. Once a vehicle has been selected and added to the job, the PND status can be changed manually.
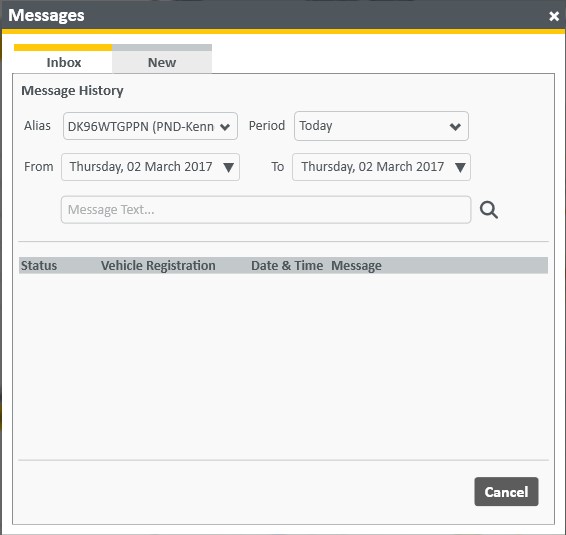
Messages
1. When a vehicle has been added to a job, the user will be able to send a message from Empower to the PND installed in the vehicle.
2. Select the Message icon next to the “Vehicles on Job” section.
3. A popup will open with two tabs allowing the user to either view previous messages sent to a vehicle or to send a new message.
4. The Inbox section allows the user to filter for previously sent messages.
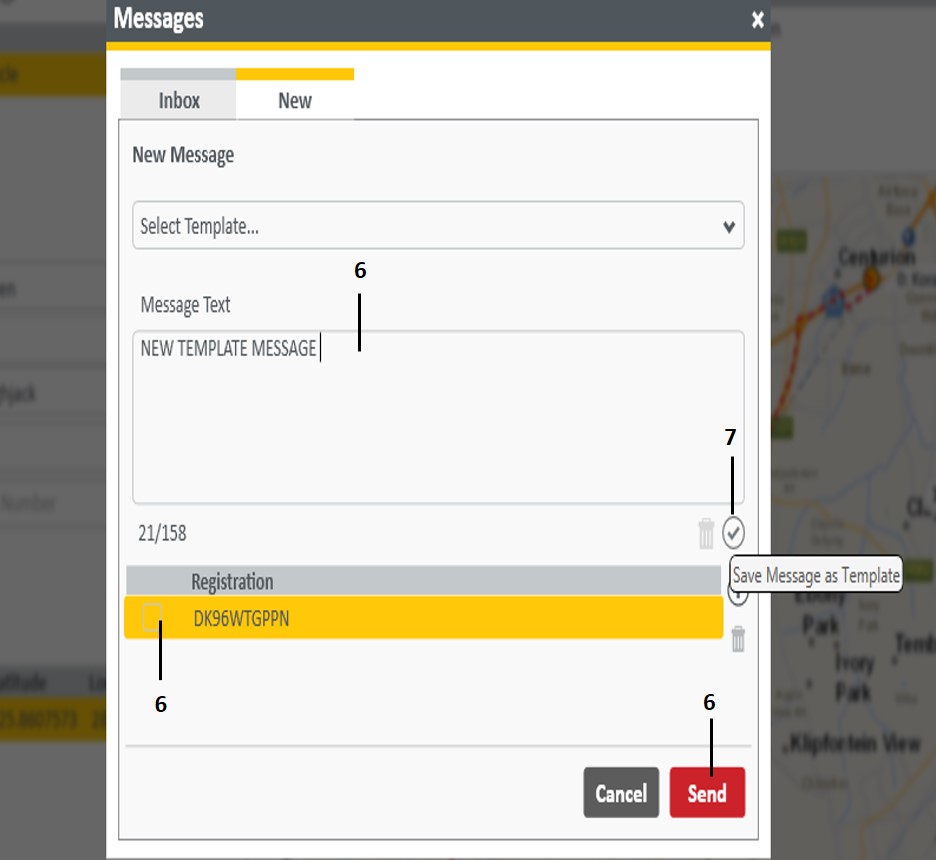
5. The New section allows the user to send a new message to a vehicle or to save a message as a template.
6. The user can type a new message in the message field, select the applicable vehicle and click the send button.
7. To save a message as a template, complete the message field and select the save as template option.