|
9.1 Video Tab Functions
|
 
|
|
9.1 Video Tab Functions
|
|
9.1 Video Tab Functions
Purpose: A Video feature has been added to Empower to allow for the monitoring of video feeds. This feature is only available provided that a camera solution has been installed in a vehicle.
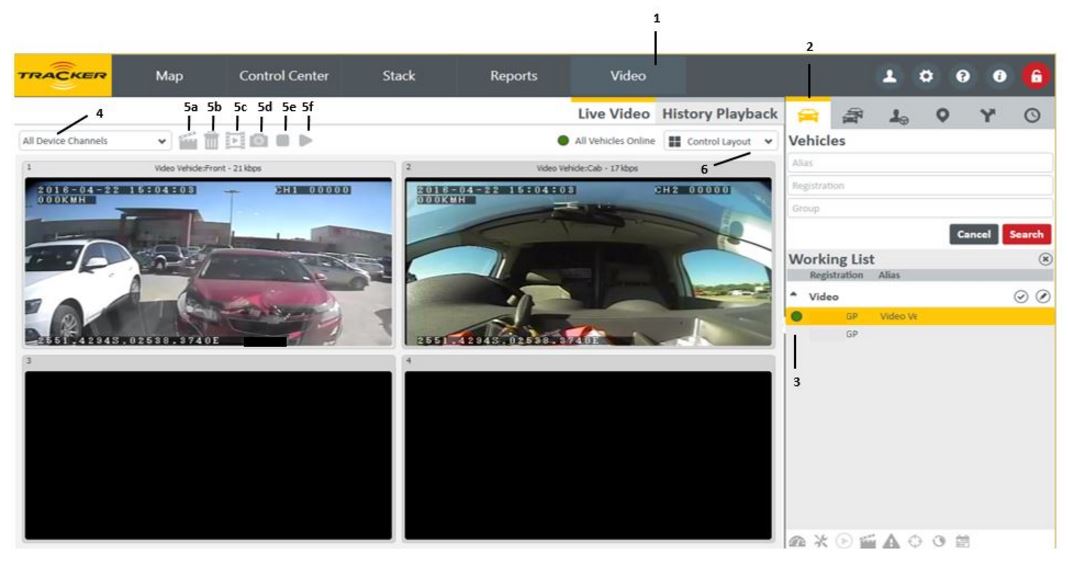
9.1.1. Live Video
1. Select the Video Tab which opens the Video Control Layout.
2. The side bar on the right allows the user to search for Vehicles. Add a camera fitted vehicle to the Working list.
3. Once the vehicle on the Working List has been selected, a red or green icon will display next to the vehicle registration to indicate whether the vehicle camera is online.
4. A Drop down box is available for the user to select a channel to view. The number of available channels will depend on the number of cameras installed.
5. When a vehicle camera is online, the user will be able to select the following options:
a. Add device Channel
b. Remove Device Video
c. View Playback
d. Capture Image
e. Stop Selected
f. Play Selected
6. A Drop down box is available to select the control layout of the cameras, the layout will again depend on the number of cameras installed.
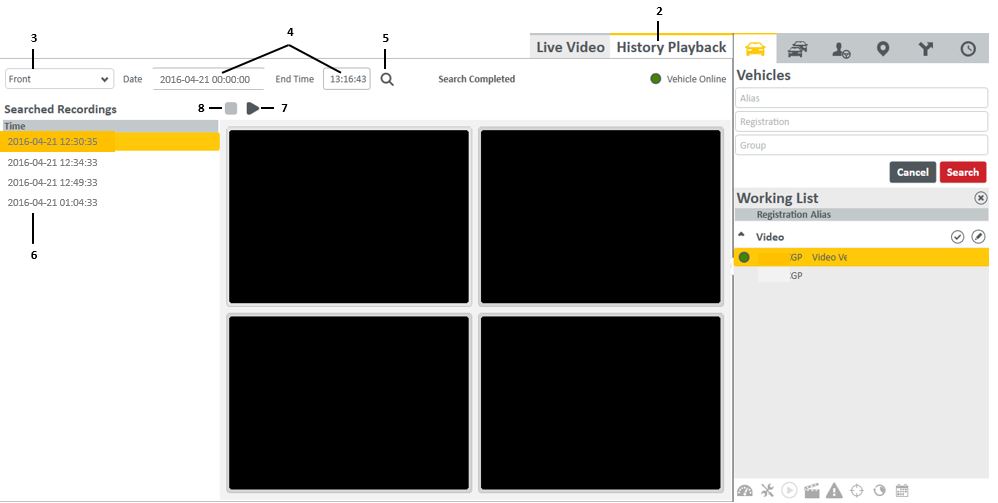
9.1.2. History Playback
1. Select the Video Tab which opens the Video Control Layout.
2. Select the History Playback option to search for History Recordings.
3. A drop down box is available to select the camera that the user would retrieve history recordings from.
4. Select a date and a start and end time range for the history search.
5. Click on the Search icon to start the search for history recordings.
6. If any recordings are available for the selected time range, the available recordings will be displayed under Searched Recordings.
7. Select one of the available recordings and click on the Start Playback icon.
8. To stop the selected recording, click on the Stop Playback icon.