|
3.3.1 Vehicle Tab Functions
|
 
|
|
3.3.1 Vehicle Tab Functions
|
|
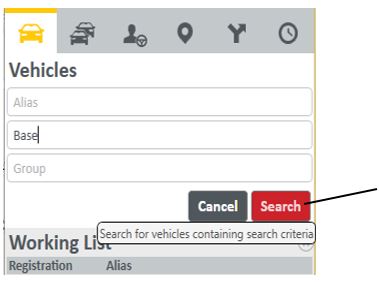
"Click on the Vehicles tab to open the Vehicles side bar:
|
Icon Symbol |
Purpose |
||
|
|
Search for vehicles containing search criteria.
|
||
|
|
Cancel. Activating this icon, will clear all vehicle or group data entered into the search fields. |
||
|
|
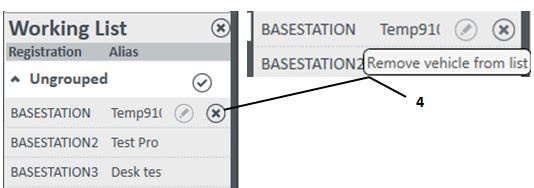
Add selected to working list
|
||
|
|
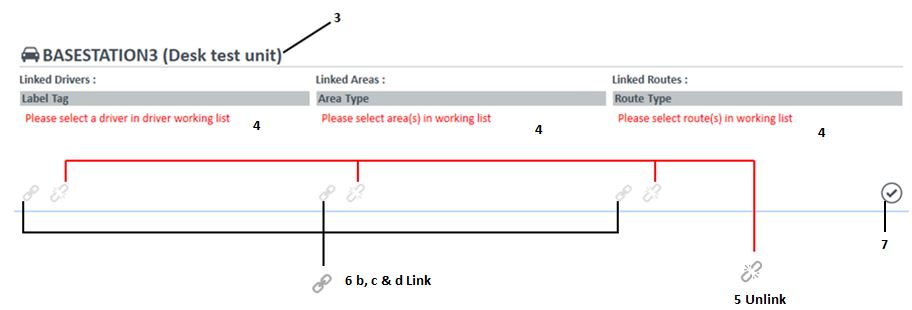
Edit Vehicle: This icon at the bottom left of the Working List, allows the user to link/unlink Drivers and/or Areas and/or Routes to/from a Vehicle. 1. Search for the vehicle that needs to be linked/unlinked to/from a Driver and/or Areas and/or Routes . Transfer the vehicle to the Working List. Select the vehicle in the Working List. 2. Select the Edit Vehicle icon to open the Vehicle Manager window.
3. The Vehicle details appear on the window left upper side which can be Linked or Unlinked from a Driver and/or Areas and/or Routes. 4. If the Vehicle is currently linked to Driver, Area or Route, "click" on the Driver/Area/Route. The Unlinked icon below the respective sections will become active. 5. "Click" on the Unlink icon which will disconnect the Vehicle from a Driver, Area or Route. 6. To Link a Driver, Area or Route to a Vehicle, the Driver,Area or Route needs to be added to the Working List in order to link it to the selected vehicle by: a. Search for the Driver, Area or Route that needs to be linked to a Vehicle. Transfer the Driver, Area or Route to the Working List. Select the item in the Working List. (Refer to Section 3.4 for driversand Section 3.5 for Area processes and Section 3.6 for Route processes ) b. Link the selected Driver to the Vehicle by "clicking" the Link icon below the Linked Drivers section. The Driver details will be listed in the window. c. Link the selected Area to the Vehicle by "clicking" the Link icon below the Linked Areas section. The Area details will be listed in the window. d. Link the selected Route to the Vehicle by "clicking" the Link icon below the Linked Routes section. The Route will be listed in the window. 7. Close Vehicle Manager window by "clicking" the icon right bottom |