|
3.3.1.1 Active Icons
|
 
|
|
3.3.1.1 Active Icons
|
|
3.3.1.1 Active Icons
The icons below provide access to the following functions:
![]()
Table 2: Active Icons
|
Icon |
Purpose |
|
|
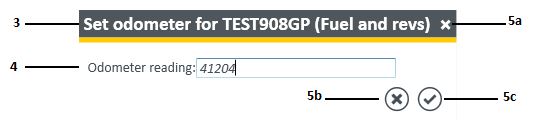
Set Odometer on Selected Vehicle: 1. Search for the Vehicle that requires an update/correction of its odometer reading. Transfer it to the Working List and select the Vehicle. 2. "Click" on the Set Odometer on Selected Vehicle icon. 3. The Set odometer for (registration number and name) window opens. 4. Change or enter the correct odometer data in the Odometer reading field 5. The user can now: a. Close the window without saving the change. b. Cancel the correction without changing the original reading c. Save the change and exit the window.
|
|
|
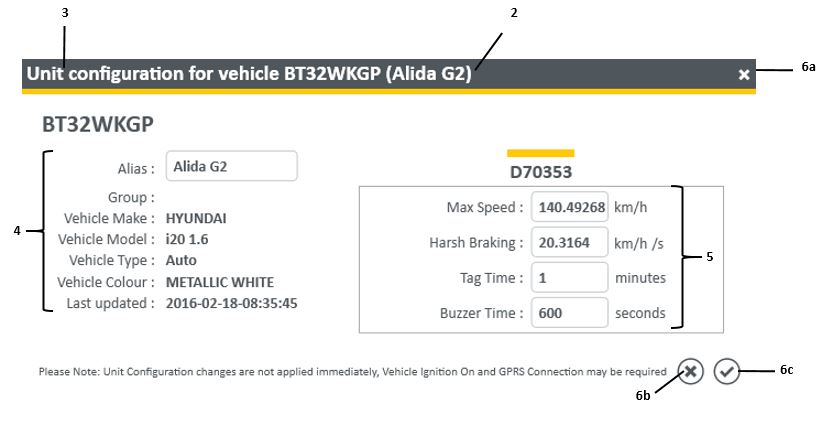
Unit Configuration of
selected vehicle: 1. Search for the Vehicle that requires Unit Configuration changes. Transfer it to the Working List and select the Vehicle. 2. Select the Unit Configuration icon to view/change the unit configurations for the selected vehicle in the Working List. 3. The Unit Configuration for vehicle (registration number and name) window opens. 4. All fields except the vehicle Alias field are inactive. The user is able to change the vehicle Alias. 5. The fields on the right side of the window can be changed by "clicking" in them. Enter the new values. 6. The user can now: a. Close the window without saving the change. b. Cancel the correction without changing the original reading c. Save the changes and exit the window.
|
|
|
|
|
|
Add Stack Event:
1. Search for the vehicle on which a stack event needs to be added. Transfer the vehicle to the Working List and select the Vehicle. 2. "Click" on the Add Stack Event icon to open the Create manual stack event Confirmation. 3. "Click" on the confirmation tick to create a manual stack event.
|
|
|
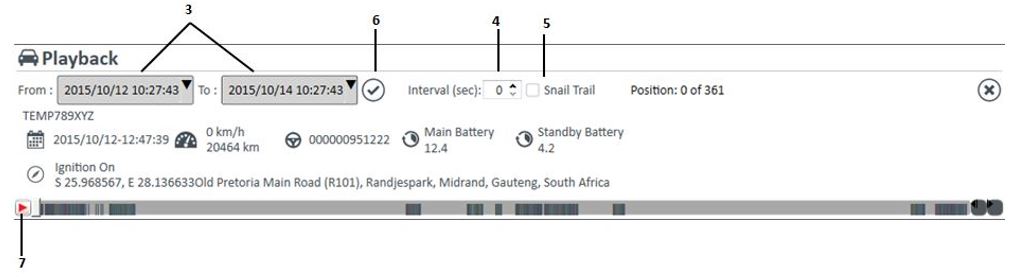
Playback: 1. Search for the vehicle on which a playback is required. Transfer the vehicle to the Working List and select the Vehicle. 2. "Click" on the Playback icon to open the Playback window. 3. Select the date/time range (From date and To date). 4. Set the Intervals (sec) between 2 - 59 seconds. 5. "Click" the Snail Trail tick box to view the trail as the playback is done. 6. Select Get playback data icon. Empower will retrieve the data from the Tracker server. 7. Select the Play button. A progress bar indicates the time and date of the playback while the route is plotted on the map.
|
|
|
|
|
|
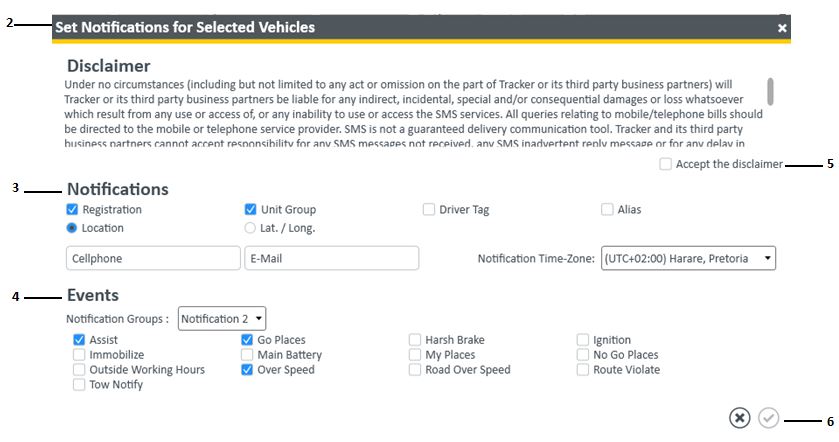
Set Notification: 1. Search for the Vehicle or Group to which a Notification needs to be sent. Transfer the vehicle to the Working List and select the Vehicle. 2. "Click" on the Set Notification icon to open the Set Notifications for Selected Vehicles window.
3. Select the Notifications options to setup notifications via Cell (SMS) or Email. 4. Select the Event type that needs to be notified. There are 12 Notification Groups. 5. Before any notifications can be saved, select the Accept Disclaimer tick box 6. To activate the selected notifications, the Save option is "clicked". |
|
Notification Details : Assist: When the Assist notification has
been selected for setup via SMS, e-mail or the stack, the notification will trigger
when the Assist button in the vehicle has been pressed. Buzzer: When the Buzzer notification has
been selected for setup via SMS, e-mail or the stack, the notification will
trigger when the set parameter for the Buzzer has been triggered. Call Me : When the Call Me notification has been selected for
setup via SMS, e-mail or the stack, the notification will trigger when the
Call Me button in the vehicle has been pressed. Driver Not Authorized: When the Driver Not
Authorized notification has been selected for setup via SMS, e-mail or the
stack, the notification will trigger when an unauthorized Driver Tag is used
in the vehicle. Excess Idle: When theExcess Idle notification has been selected for setup via SMS, e-mail or the stack, the notification will trigger when the vehicle idles for more than 10minutes at a time. Fuel: When theFuel notification has been
selected for setup via SMS, e-mail or the stack, the notification will
trigger when the set Fuel percentages are triggered. i.e. rapid increase or decrease in fuel
percentage. Go Places : When the Go Places notification has been selected for setup via SMS, e-mail or the stack, the notification will trigger when the vehicle leaves the set geo-fencing parameters. Harsh Brake : When theHarsh Brake notification has been selected for setup via SMS, e-mail or the stack, the notification will trigger when the vehicle reduces speed at the set speed per second, i.e. by default a Harsh Brake is set to trigger when the vehicle speed is reduced at 20km/h per second or faster. Ignition : When theIgnition notification has been selected for setup via SMS, e-mail or the stack, the notification will trigger whenever there is an ignition change in the vehicle. i.e. Ignition On or Ignition Off. Impact : When theImpact notification has
been selected for setup via SMS, e-mail or the stack, the notification will
trigger when the vehicle is in an accident triggering a G-force between 2 and
3G’s, depending on the unit installed. Input 2: When theInput 2 notification has
been selected for setup via SMS, email or the stack, the notification will
trigger when an accessory that is installed on Input 2 is in use. Main Battery : When the Main Battery notification has been selected for setup via SMS, e-mail or the stack, the notification will trigger when the battery voltage decreases below the default battery voltage triggers. i.e. Main Battery Discharge will trigger when the battery voltage is below 10.8Vlts, and Main Battery Disconnect will trigger when the battery voltage is below 1.0Vlts My Places : When the My Places notification has been selected for setup via SMS, e-mail or the stack, the notification will trigger when the vehicle enters the set geo-fencing parameters. No Go Places : When theNo Go Places notification has been selected for setup via SMS, e-mail or the stack, the notification will trigger when the vehicle enters the set geo-fencing parameters. Not Tagged: When the Not Tagged
notification has been selected for setup via SMS, e-mail or the stack, the
notification will trigger when the driver has not used the driver tag within
the set time frame after the ignition has been switched on. Over Rev: When theOver Rev
notification has been selected for setup via SMS, e-mail or the stack, the
notification will trigger when the vehicle exceeds the set RPM limit. Outside Working Hours: When
theOutside Working Hours notification has been selected for setup via SMS,
e-mail or stack, the notification will trigger whenever there is a change in
ignition or position outside of the set working times. Over Speed: When the Over Speed
notification has been selected for setup via SMS, e-mail or the stack, the
notification will trigger when the vehicle exceeds the set speed limit. Road Over Speed : When theRoad Over Speed notification has been selected for setup via SMS, e-mail or the stack, the notification will trigger when the vehicle exceeds the road speed limit. Tow Notify: When the Tow Notify notification has been selected for setup via SMS, e-mail or the stack, the notification will trigger when the vehicle is being towed. i.e. when the vehicle is moving at a speed faster than 12km/h with the ignition off. Unlabelled Tag : When theUnlabelled Tag notification has been
selected for setup via SMS, e-mail or the stack, the notification will
trigger when an unlabelled tag is used in the vehicle. |
|
|
|
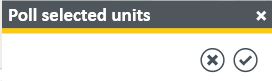
Poll Units: Select the Poll Units icon to send an update request to the installed Tracker unit. The unit will respond by updating the reporting time, provided that the vehicle's ignition is switched ON.
|
|
|
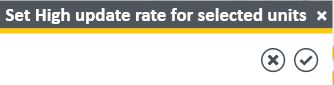
Update Mode (High): Select the Set High Update Mode icon to set the unit of the selected vehicle in high update mode. High update mode will set the unit to report every 4 seconds for 10 minutes, and is used in the event of an emergency.
|