|
10.1 Report Tab Layout
|
 
|
|
10.1 Report Tab Layout
|
|
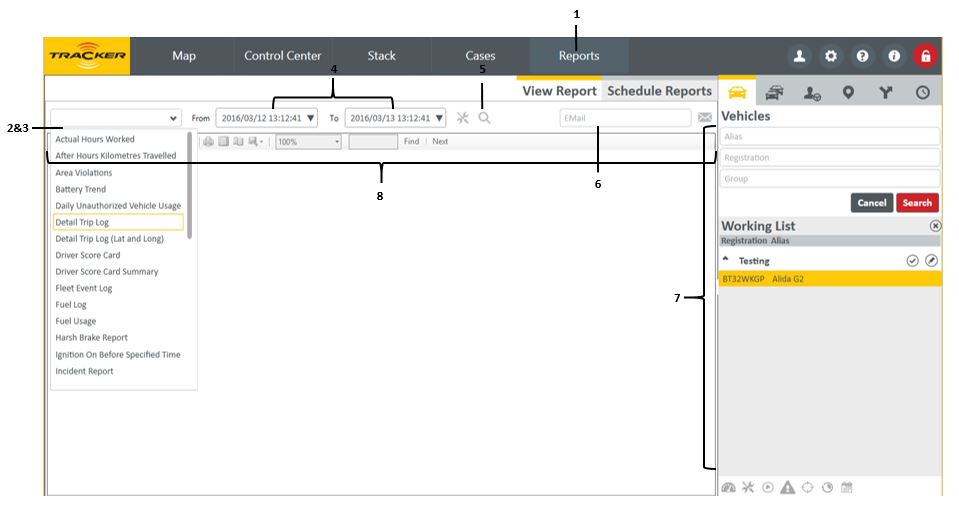
Reports
On Demand
1. Select the Reports tab to display the reports screen and select the View Report option.
2. The Selection section allows the user to choose the Report type, setup the period (From to To) and enter the Email address of the recipient.
3. A Report drop down list allows the user to choose between standard Report types available.
4. A calendar to set the From and To dates and times over which the reports is drawn.
5. The Search icon initiates the generation for the selected report. The report Loading progress is shown on the screen.
6. The Email address for the recipient of the report is entered here.
7. The side bar allows the user to search for Vehicles/Groups, Drivers, Areas or Working Times on which a report needs to be generated.
8. A toolbar allows the user to manage the generated report. This entails the forward and backward paging in multiple report pages (First Page, Next Page, Last Page, Previous Page), Stop Rendering, Refresh the data of the report, Print, Print Layout, Page Setup and Export the report to a USB device or C Drive. The formats can be XML, CSV, PDF, MHTML, EXCEL, TIFF FILE or WORD.
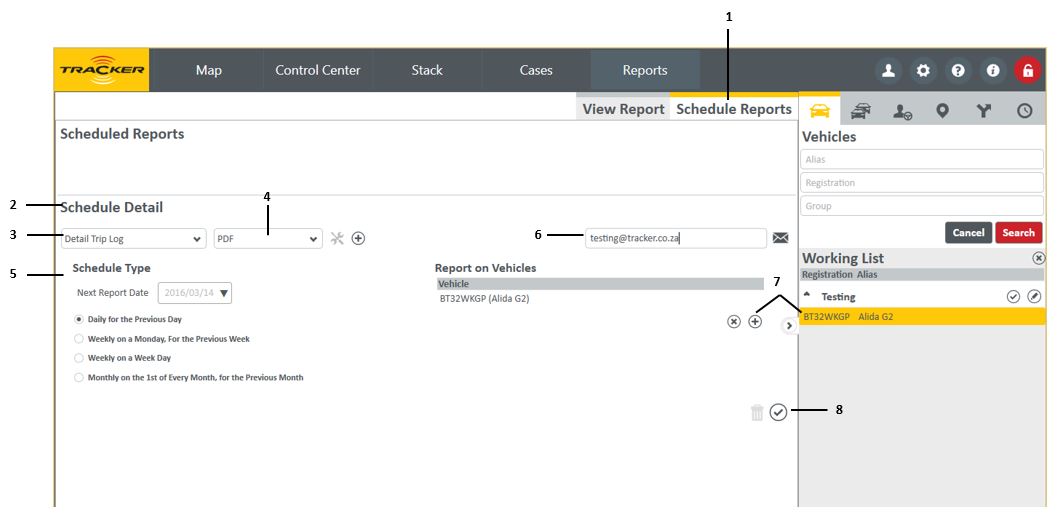
Scheduled Reports
1. Select the Reports tab to display the reports screen and select the Schedule Reports option.
2. The Schedule Detail section allows the user to choose the Report type, format, setup the Schedule type and enter the Email address of the recipient.
3. A Report drop down list allows the user to choose between standard Report types available.
4. A drop down list to select the format for the Scheduled Report, (PDF or CSV).
5. The Schedule Type allows the selction for the frequency of the scheduled report.
6. The Email address for the recipient of the report is entered here.
7. The side bar allows the user to search for Vehicles or Drivers on which a report needs to be generated.
8. Once the scheduled report has been saved, it will be added to the top of the Scheduled Reports screen.